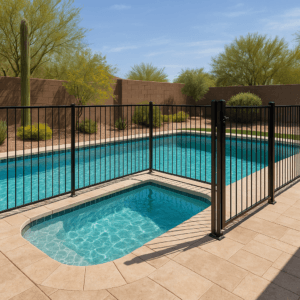
Looking to safeguard your swimming pool with a touch of DIY magic? At Pool Safety Fencing, we understand your need for a secure and child-friendly pool environment. In this guide, we’ll share our expert step-by-step instructions on installing a safety pool fence by yourself. Designed for homeowners like you, our guide is your ultimate solution to ensuring safety while enhancing your poolside aesthetic.
Contents
- 1 Gathering Essential Tools and Materials
- 2 Planning Your Fence Layout
- 3 Measuring Distances Carefully
- 4 Installing Fence Posts
- 5 Attaching Fence Panels
- 6 Ensuring Proper Gate Installation
- 7 Double-Checking Alignment and Height
- 8 Five Checklist Points for a Sturdy Pool Fence
- 9 Final Adjustments and Inspection
- 10 Maintaining Your Safety Fence
- 11 Contact Us for Expert Advice
Gathering Essential Tools and Materials
Before you don your handyman hat, let’s gather the necessary tools and materials. Being well-prepared is the first step toward a successful DIY project. You’ll need materials such as a sturdy pool fence, concrete drill bits, measuring tape, and a leveler. With everything on hand, we’ll be ready to proceed with ease.
It’s essential to select high-quality materials for durability. By choosing the best, you extend the life of your pool fence while enhancing its safety features. Now, let’s move on to the next phase of the installation journey.
Planning Your Fence Layout
The layout of your pool fence requires thoughtful consideration. It’s not just about aesthetics, but ensuring all potential access points are adequately guarded. Start by sketching a layout that marks the perimeter, considering both pool surroundings and access pathways.
Once your rough sketch is in place, you can visualize the setup better. Measure the available space and take note of any specific areas that require additional attention. This step lays the groundwork for proceeding efficiently with installation.
Measuring Distances Carefully
Accuracy reigns supreme when it comes to measuring. With a measuring tape, determine the exact distances between fence posts. Proper spacing ensures not only effective security but also structural integrity.
Take measurements with precision to avoid any costly errors. This attention to detail will save you time and strengthen the overall stability of the fence.
Installing Fence Posts
It’s time to roll up your sleeves and start with the posts. Install them securely by using a concrete drill bit to create holes in the ground. Ensure each post is firmly anchored and completely upright with a leveler.
Repeating this process, post by post, builds the foundation of your fence. Consistency is key, as any discrepancy might affect the alignment and safety features of your installation. Keep a close eye on each detail.
Attaching Fence Panels
With the posts in place, it’s time to affix the fence panels. Begin at one end and work your way systematically to ensure uniformity. Secure each panel to the posts with appropriate brackets, ensuring they fit snugly to avoid gaps.
Each connection point strengthens your fence’s overall integrity, so a careful approach is necessary here. As you progress, marvel at the transformation of your backyard into a safer oasis.
Ensuring Proper Gate Installation
Your pool area’s main access point needs special attention. A well-fitted gate maintains both security and convenience. Position your gate strategically, choosing a level spot that allows easy access while ensuring it swings outward from the pool.
Install self-closing hinges and a reliable latch that’s out of a child’s reach. This step is crucial in maintaining safety, rendering your enclosure more effective and childproof.
Double-Checking Alignment and Height
Before moving on to final touches, let’s validate your efforts. Verify the alignment and height of the entire fence. Smaller inconsistencies can be easily corrected at this stage, ensuring your safety fence is both functional and visually appealing.
Take a step back and assess whether your work meets your expectations as well as safety standards. Adjust any misalignments for optimal results, allowing your handiwork to truly shine.
Five Checklist Points for a Sturdy Pool Fence
- Durability: Ensure materials used can withstand weather conditions for sustained safety without compromise.
- Seamless Connections: Check that all attachments and brackets are firmly in place and show no signs of looseness.
- Childproof Locks: Verify that all gates are securely closed and that locks are beyond a child’s reach yet easy for adults to operate.
- Even Spacing: Each fence element should be evenly spaced and stable, exhibiting strong structural integrity.
- Height Regulations: Confirm your fence meets your area’s safety standards for height and structure, reinforcing compliance and security.
Final Adjustments and Inspection
Congratulations on your nearly completed project! Now, let’s make the final tweaks. Walk around your fenced area and inspect for any loose fittings or irregularities, ensuring everything operates smoothly.
A thorough inspection not only validates your handiwork but instills confidence in the safety measures you’ve implemented. You’ve transformed your swimming area into a secure and inviting space, perfect for family fun!
Maintaining Your Safety Fence
Once installed, continuous maintenance is key. Regularly check your fence for signs of wear and tear, especially after inclement weather. Tighten any loose screws and replace corroded parts to prevent potential breaches.
Caring for your pool safety fence prolongs its life and efficacy. In doing so, you sustain a protective environment for years of safe poolside enjoyment.
Contact Us for Expert Advice
While DIY is commendable, we understand that sometimes professional intervention is required. For expert advice or assistance, reach out to us by phone at 480-771-8026 or request a free quote. Whether a simple query or a full-service inquiry, we’re here to support your safety efforts with expertise and care.


