At Pool Safety Fencing, we understand that keeping your loved ones safe is a priority. Does the thought of having a safe, secured pool without the hefty price tag appeal to you? You’re in the right place. This blog post is your ultimate guide on how to install a DIY pool fence, designed to help maricopa County homeowners secure their pools effectively and affordably.
Contents
Why Consider a DIY Pool Fence?
The safety of your family and pets around the pool is paramount. Installing a DIY pool fence not only adds a layer of protection but also gives you peace of mind. Furthermore, opting for a DIY approach can save you money while still ensuring safety.
Gather Your Tools and Materials
Before diving into the installation, let’s talk about the essential tools and materials you’ll need. A well-prepared toolkit makes all the difference.
- Measuring Tape: Ensures precise measurements for the fence posts and panels.
- Drill: Necessary for making holes to fix the fence securely.
- Level: Keeps your fence straight and even, avoiding any tilts or slopes.
- Fence Kit: Includes panels, posts, and hardware, ensuring you have everything in one package.
- Concrete: Useful for setting the posts firmly into the ground.
Choose the Perfect Fence Model
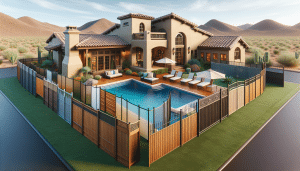
Deciding on the right fence model is crucial. Our fences come in various styles and materials to suit different needs. Whether you prefer a mesh design for visibility or a solid panel for maximum privacy, make sure to choose one that aligns with your aesthetic and functional requirements.
Create a Safety Plan
Mapping out safety zones around the pool is vital. Identify where the fence will start and end, and ensure there’s a secure gate for easy access. This plan acts as your installation blueprint, reducing the risk of errors.
Measure the Perimeter
Accurate measurements are key to a successful installation. Use your measuring tape to determine the perimeter of the area you want to fence. Mark these measurements on the ground to set your boundaries clearly.
Dig and Set the Posts
With measurements and materials ready, it’s time to dig post holes. Use your drill to make holes deep enough to stabilize the posts. Place the posts in the holes and fill with concrete for added security. Make sure to use the level to maintain evenness.
Assemble the Fence Panels
Now that the posts are secure, you can start assembling the panels. Lay out the panels beside the posts and attach them using the provided hardware. Ensure each panel is firmly fixed before moving on to the next section.
Install the Gate
A secure gate is an essential component of your pool fence. Position your gate at a convenient location and install it following the manufacturer’s instructions. Make sure it has a lock or latch to prevent unauthorized access.
Inspect and Test
Once everything is in place, a thorough inspection is necessary. Check for any loose panels or posts and make adjustments as needed. Test the gate to make sure it functions smoothly and locks securely.
Maintain Your Pool Fence
Regular maintenance prolongs the life of your pool fence. Clean the panels periodically to prevent buildup of debris. Also, check the posts and hardware for signs of wear and tear, addressing any issues promptly.
Need Professional Help?
While a DIY project can be rewarding, sometimes professional assistance is needed. If you find the installation process overwhelming or complex, don’t hesitate to reach out to us.
For expert assistance, call us at 480-771-8026 or request a free quote.