Worried about the safety of your pool area but not sure where to start with fencing? Look no further! This guide is crafted for homeowners eager to enhance pool safety with DIY fence installation—a perfect blend of guidance and empowerment.
Contents
Understanding the Importance of Pool Fencing
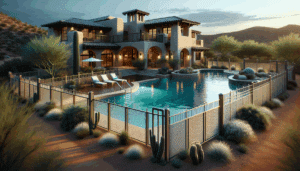
Installing a pool fence isn’t just about complying with regulations; it’s about ensuring the safety and security of your loved ones. Drowning is a significant risk, especially for young children, and a well-installed pool fence acts as a critical barrier.
By committing to a DIY pool fence installation, we’re taking proactive steps to mitigate accidents. Let’s explore how we can transform our pool areas into safe havens, while gaining a sense of accomplishment through DIY success.
Tools and Materials You’ll Need
Before we dive into the installation process, having the right tools and materials ready is crucial. This preparation phase not only saves time but also makes the process smoother.
For this project, we’ll need a tape measure, post-hole digger, level, drill, and of course, the fencing materials themselves. Make sure everything is within reach before starting, ensuring an efficient workflow.
Planning Your Fence Layout
The first step in our DIY project is to lay out a clear plan of where the fence will be installed. Consider aspects such as the pool’s shape, any pre-existing structures, and how they might influence the fence’s placement.
Once we’ve sketched a basic layout, walk the perimeter to ensure there are no unexpected obstacles. This walk-through allows us to make any necessary adjustments to the plan before breaking ground.
Measuring Your Pool Area
Accurate measurements are the backbone of a successful installation. With our tape measure in hand, let’s carefully measure the entire perimeter where the fence will be installed.
Remember, it’s better to measure twice and cut once. This diligence helps avoid waste and ensures that the materials we purchase fit perfectly into our plan.
Marking the Ground
With measurements in hand, we’ll proceed to mark the ground where each fence post will be placed. Consistency is key, so ensure each mark is equidistant from the next to maintain even spacing.
Use spray paint or small stakes to mark these spots clearly. This preparation step is pivotal for keeping the installation process straightforward and stress-free.
Digging Post Holes
Now, it’s time to dig! Using the post-hole digger, we need to create holes deep enough to ensure stability. Typically, a depth of about one-third the post height is sufficient.
Maintain focus on depth and width uniformity across all holes. Consistent post holes will ensure our fence remains sturdy and aesthetically pleasing once erected.
Setting Fence Posts
- Vertical Alignment: Use a level to ensure each post stands perfectly vertical. Proper alignment is critical for both functionality and appearance.
- Concrete Stabilization: Mix and pour concrete into each hole for added stability. Concrete provides a solid base that secures our fence posts effectively.
- Drying Time: Allow adequate time for the concrete to dry completely. Patience here ensures a strong foundation and a long-lasting fence.
- Post Height Check: Double-check the height of each post, making sure they are uniform. This consistency enhances aesthetic appeal and prevents future issues.
- Diagonal Support: Use temporary braces to hold posts steady until the concrete sets fully. It’s a simple step that adds extra assurance during the drying phase.
Attaching Fence Panels
Our concrete is set, and the posts are sturdy—now to attach the panels! Begin by aligning each panel with the secured posts, ensuring they are level and correctly positioned.
Securing panels with screws or bolts, follow the manufacturer’s instructions for optimal attachment. This step is often the most rewarding as we see our fence taking shape before our eyes.
Installing the Gate
The pool fence’s functionality hinges on a well-installed gate. Begin by selecting the best location for the gate to ensure easy access while maintaining security.
Pay attention to the gate’s locking mechanism, ensuring it is childproof and reliable. Set the hinges securely, checking for smooth operation and proper closing alignment.
Final Inspection and Adjustments
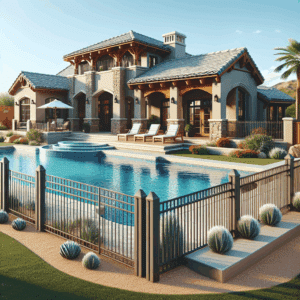
With the fence fully erected, a meticulous inspection ensures no details are overlooked. Walk the perimeter to check for any necessary adjustments or corrections.
Identify any panels or posts that require tightening or repositioning. Final adjustments solidify the fence’s safety and aesthetic value, bringing our project to a satisfying conclusion.
Conclusion
Installing a pool fence can greatly enhance safety while adding value to your home. For personalized assistance, call us at 480-771-8026 or Request a Free Quote today!