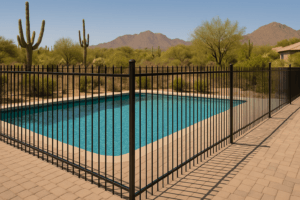
Welcome to the Summer Safety Series brought to you by Pool Safety Fencing. In this installment, we’ll guide you through the process of installing a pool fence step by step. Ensuring pool safety is paramount during the summer season, and a well-installed fence can provide the protection your loved ones need.
Contents
- 1 Step 1: Determine the Location and Layout
- 2 Step 2: Choose the Right Materials
- 3 Step 3: Check Local Regulations
- 4 Step 4: Plan for Gates
- 5 Step 5: Install the Fence Posts
- 6 Step 6: Install the Fence Panels
- 7 Step 7: Install the Gate(s)
- 8 Step 8: Secure All Components
- 9 Step 9: Add Finishing Touches
- 10 Step 10: Regular Maintenance
- 11 Conclusion
Step 1: Determine the Location and Layout
The first step in installing a pool fence is determining the layout and location. Measure the perimeter of your pool area and decide where the fence will be installed. Ensure that the fence provides a clear barrier around the pool, leaving no gaps for unauthorized access.
Step 2: Choose the Right Materials
Selecting the appropriate materials for your pool fence is crucial. Common materials include aluminum, steel, wood, vinyl, glass, and mesh. Consider factors such as durability, maintenance requirements, and aesthetics when making your choice.
Step 3: Check Local Regulations
Before proceeding, check your local regulations and building codes regarding pool fences. These regulations may specify fence height, gate requirements, and other safety features that must be followed. Ensure that your fence design complies with these guidelines.
Step 4: Plan for Gates
Gates are essential components of a pool fence. Plan for gate placement at convenient and safe locations. Gates should have self-closing and self-latching mechanisms to prevent unauthorized access. Measure and install gates carefully to ensure they align with the fence.
Step 5: Install the Fence Posts
Begin the installation process by setting up the fence posts. Posts provide stability and support for the fence panels. Ensure that the posts are securely anchored in the ground, and they are plumb and level.
Step 6: Install the Fence Panels
Once the posts are in place, install the fence panels according to your chosen material. Follow the manufacturer’s instructions for proper installation. Ensure that panels are tightly secured to the posts and are at the correct height to meet safety regulations.
Step 7: Install the Gate(s)
Install the gate(s) as per the manufacturer’s guidelines. Ensure that they swing outward, away from the pool area, and have self-closing and self-latching mechanisms. Test the gate(s) to ensure they operate smoothly and securely.
Step 8: Secure All Components
Double-check that all components, including panels, posts, and gates, are securely fastened. Ensure that there are no gaps or openings that could allow access to the pool area.
Step 9: Add Finishing Touches
Depending on your chosen material, you may need to add finishing touches such as paint, stain, or sealing to protect the fence from the elements. This step also contributes to the aesthetics of your pool area.
Step 10: Regular Maintenance
Maintain your pool fence regularly to ensure its continued effectiveness. Inspect for wear and tear, lubricate gate locks, and perform any necessary repairs promptly.
Conclusion
Installing a pool fence is a crucial step in enhancing pool safety during the summer season. By following these steps and adhering to local regulations, you can create a secure and enjoyable pool environment for your family and guests.
For expert guidance and assistance in installing a pool fence, contact Pool Safety Fencing at 480-771-8026. Our team is here to help you make your pool area safer for the summer and beyond.
Stay tuned for more summer safety tips from the Summer Safety Series by Pool Safety Fencing.


